
Hello friends welcome to FreeCAD tutorial in our previous tutorial we have learned FreeCAD Part Modeling Tutorial 133. In this tutorial we will do modeling in FreeCAD with the help of Part design workbench of FreeCAD. You can also download my source file of the tutorial at https://mechnexus.com/mechnexus-youtube-tutorial-source-file/ so let’s start our tutorial.
Also Read-:
| How to use Multi View in FreeCAD Drawing |
| Let’s understand FreeCAD Part Workbench |
| Let’s Explore Basics of the FreeCAD |
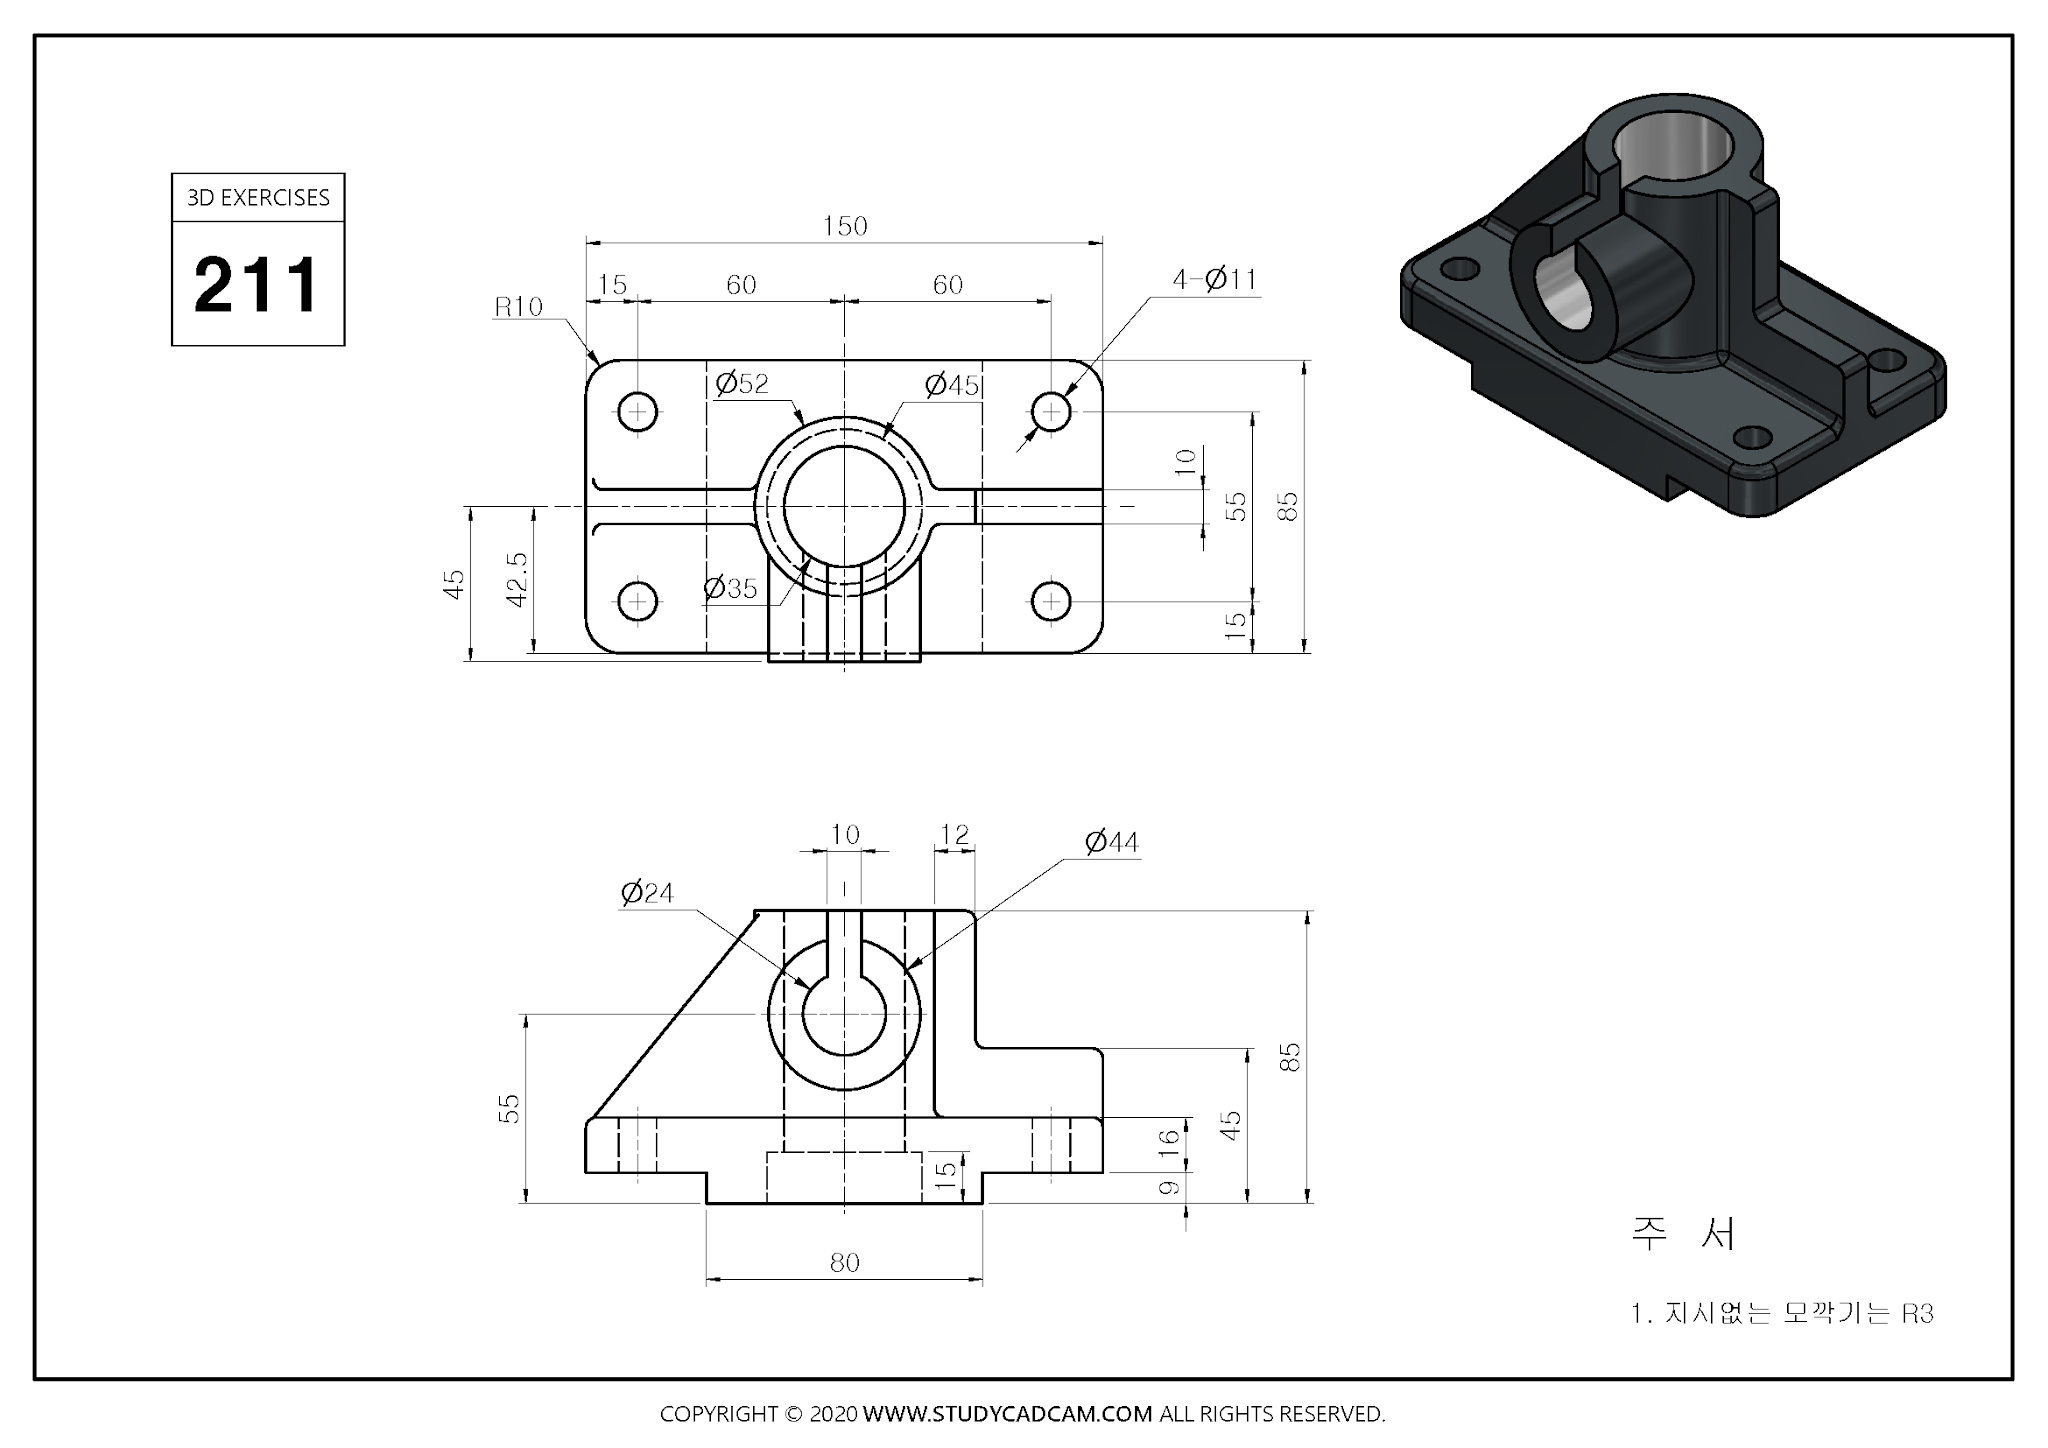
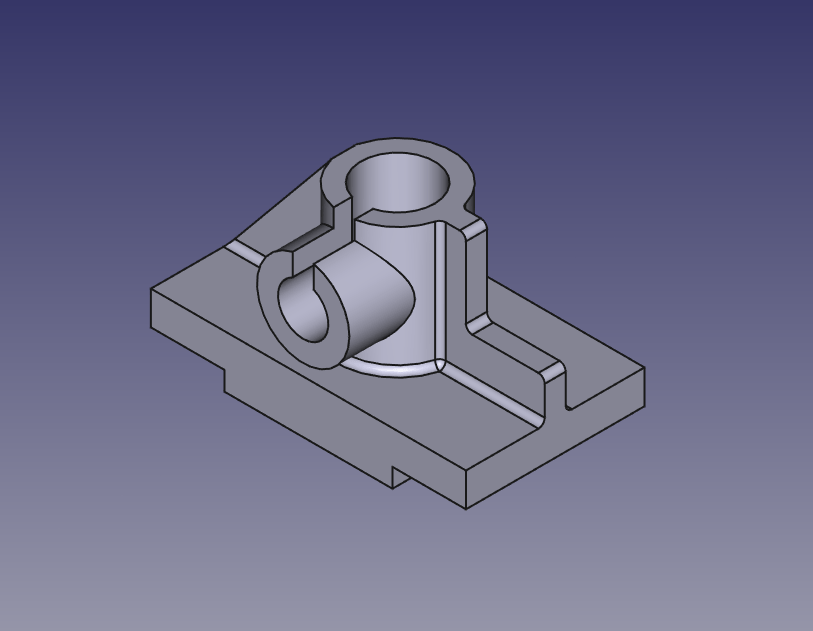
Step by Step Guide to Convert below drawing into 3D Model -:
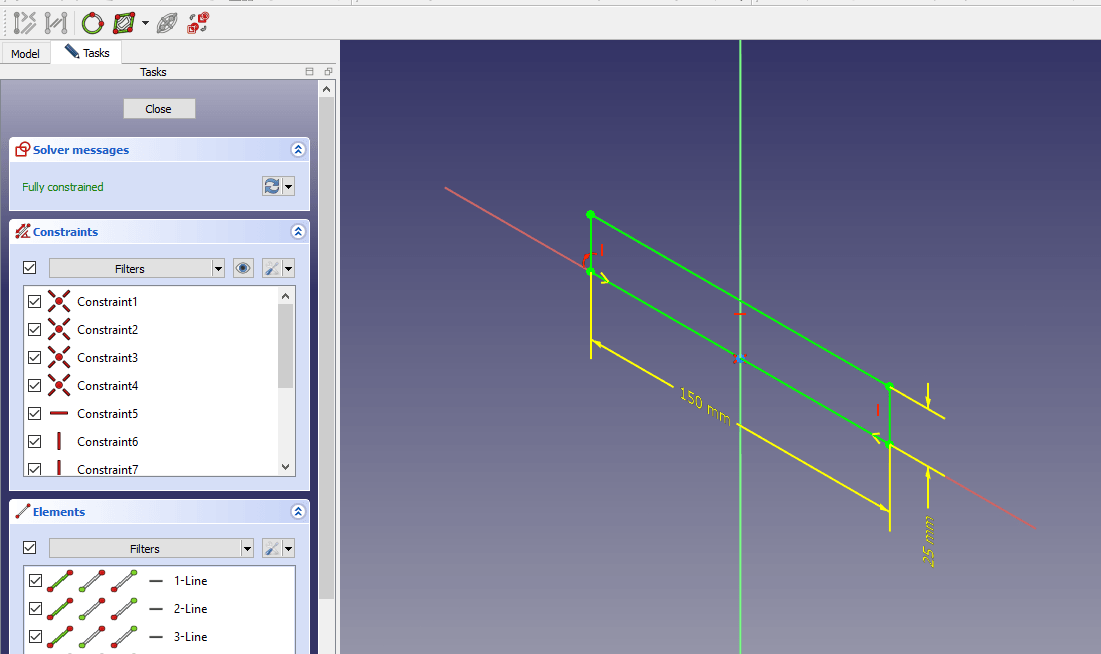
 Select the front plane and create the below sketch.
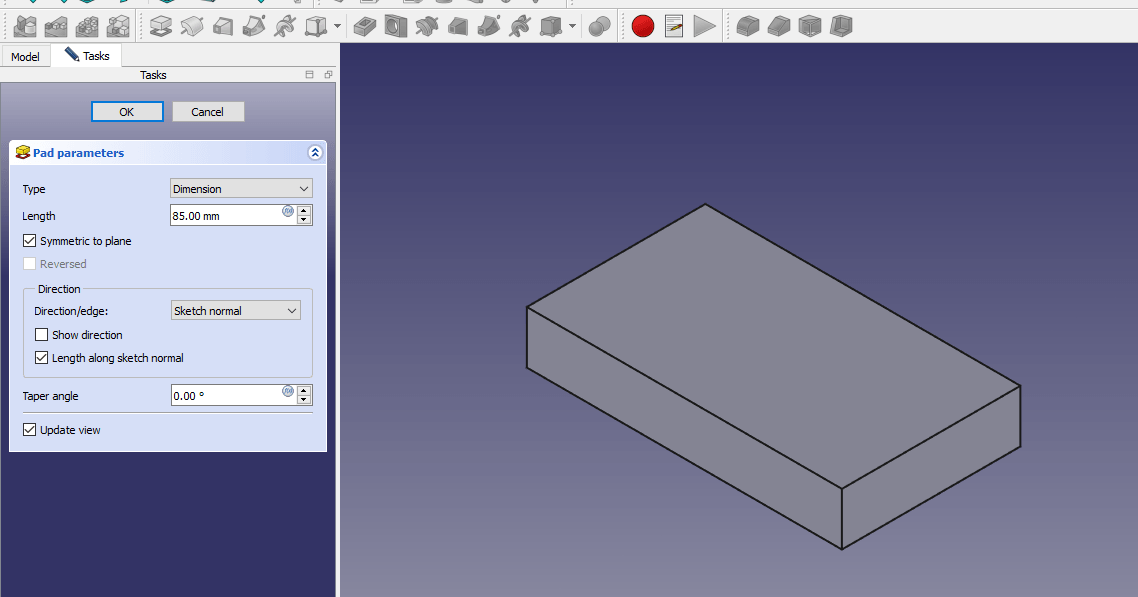
 Now extrude the above sketch to the to the distance of 85mm As shown in below image.
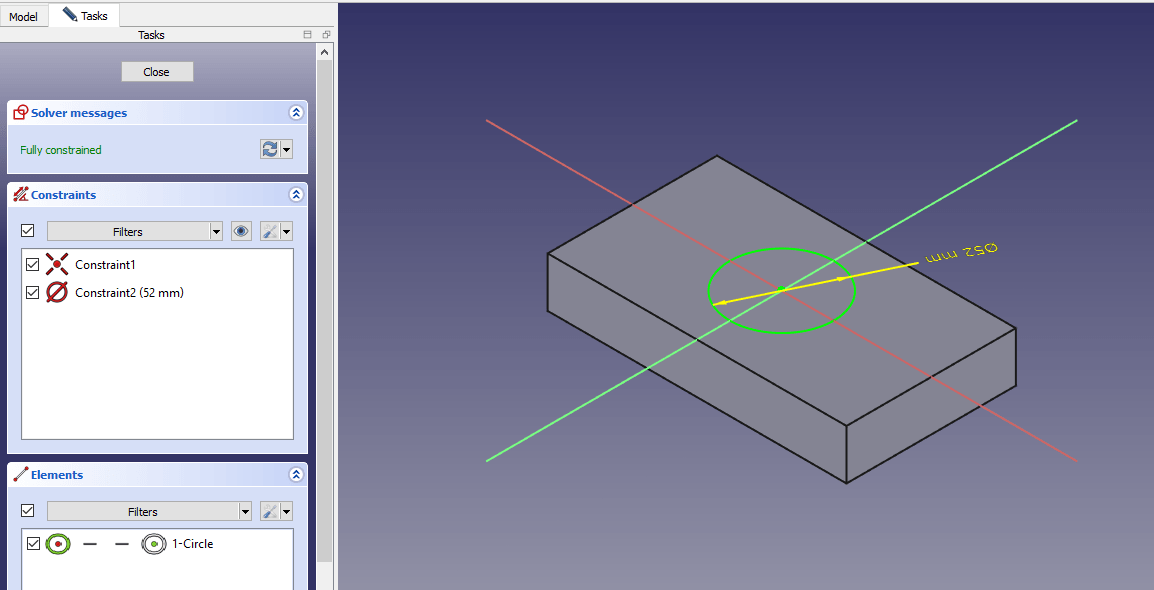
 Now select the top face and create the hole sketch of 52mm As shown in below image.
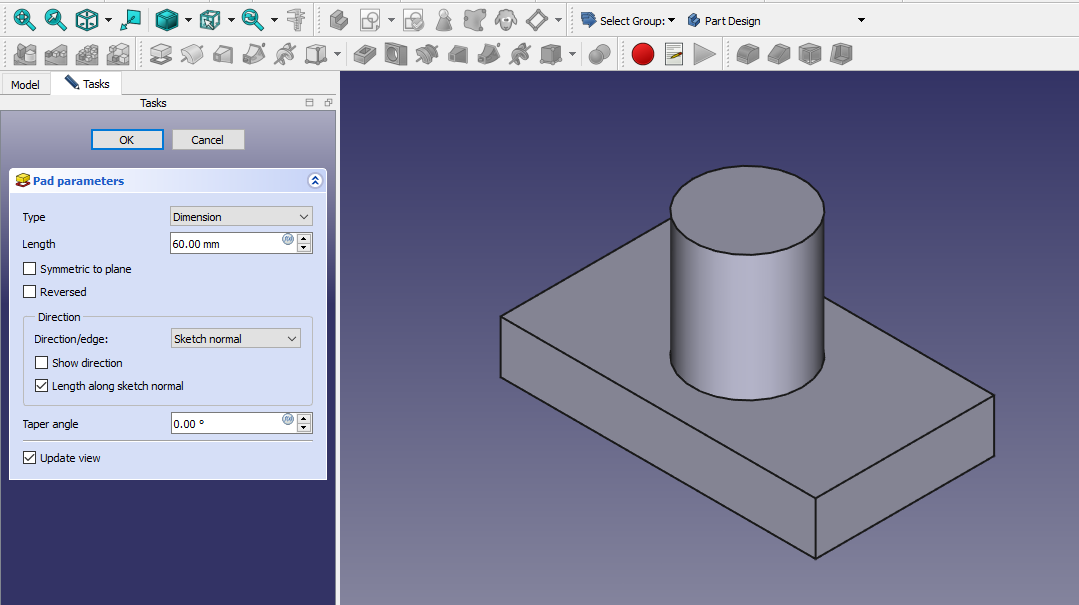
 Now add the material to the distance of 60mm As shown in below image.
 Now select the top face and create the below sketch.
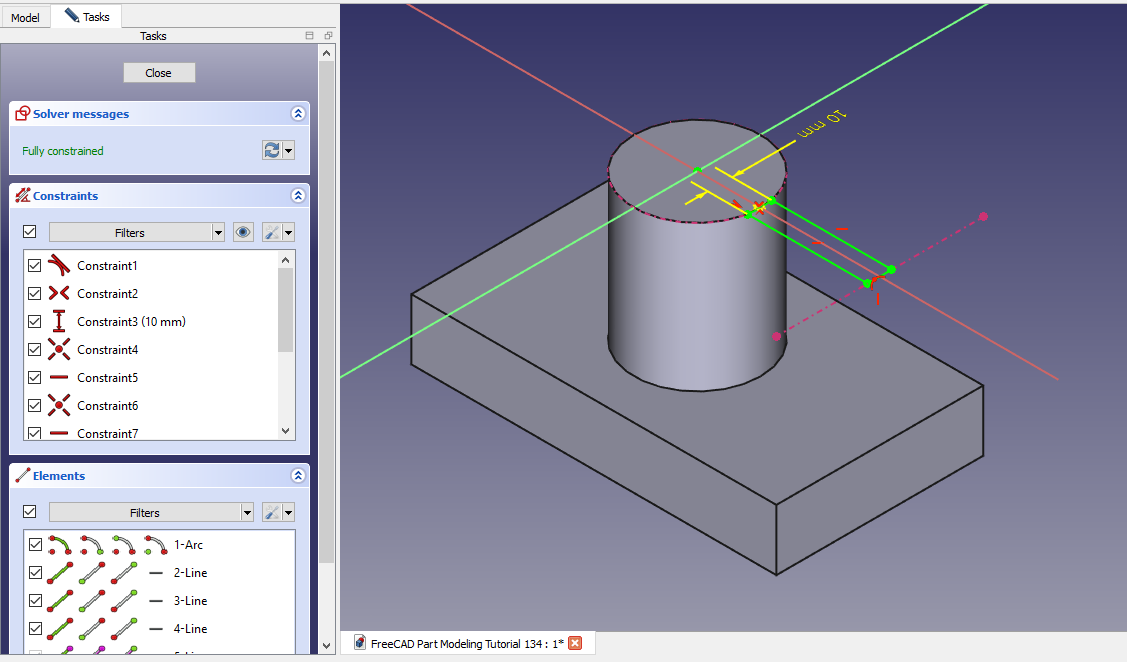 Now add the material and set end condition up-to face as shown in below image.
 Now create the sketch as shown in below image.
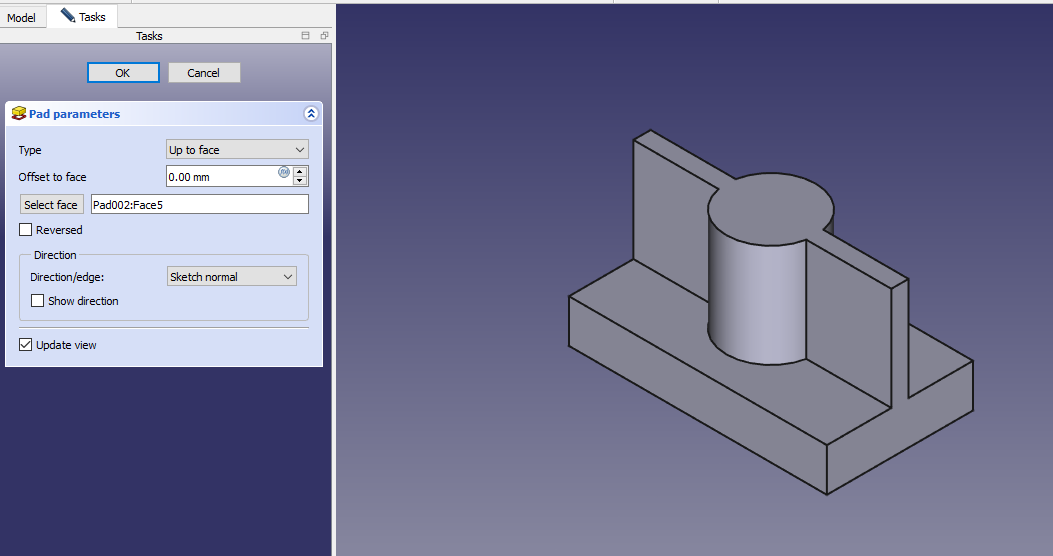
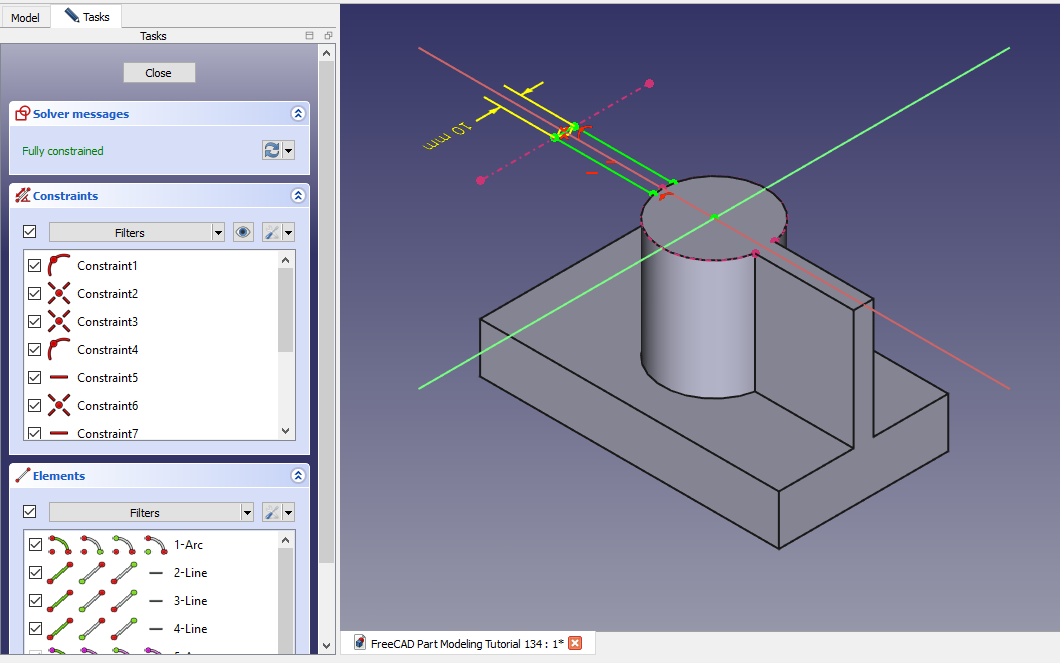 Now add the mate As shown in below image.
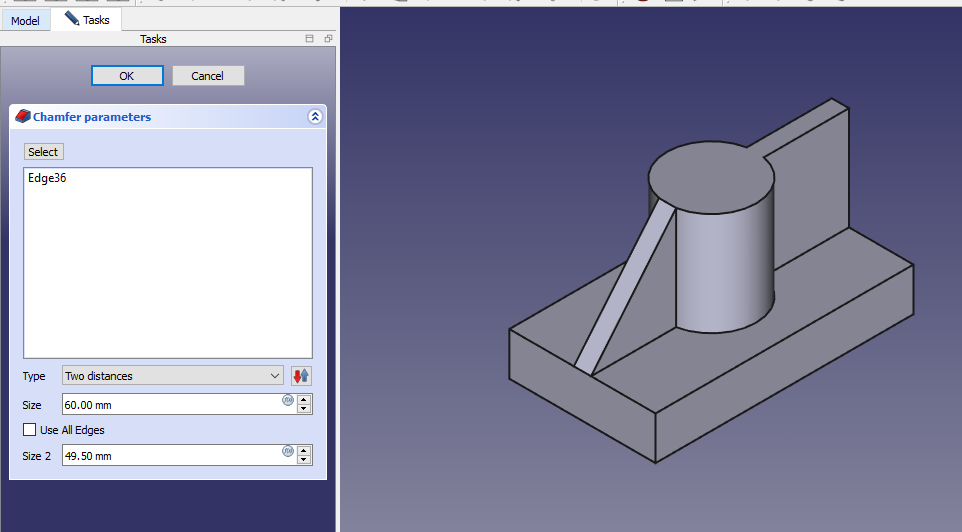
 Now create the chamfer As shown in below image.
 Now select the face and create below sketch.
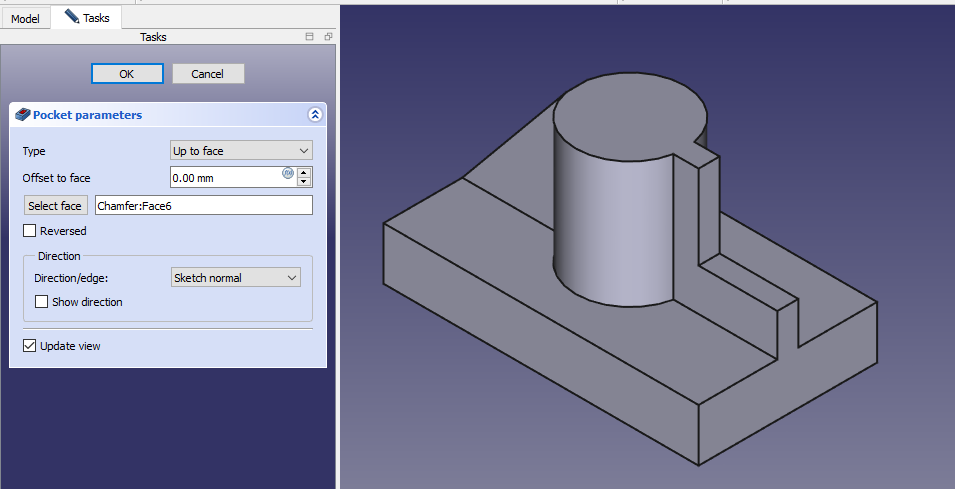
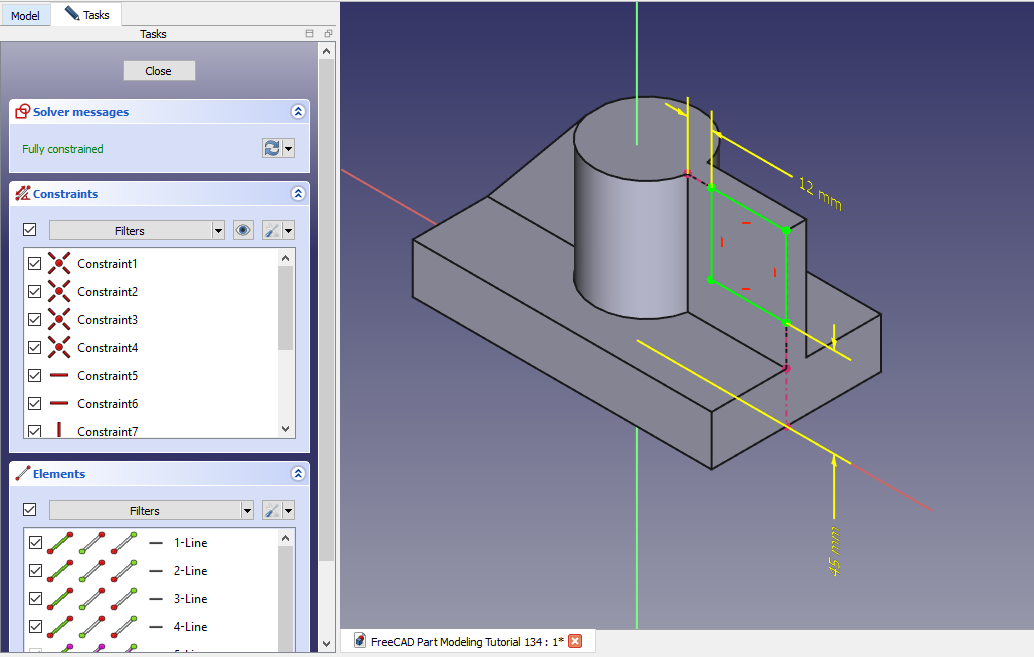 Create the cut As shown in below image.
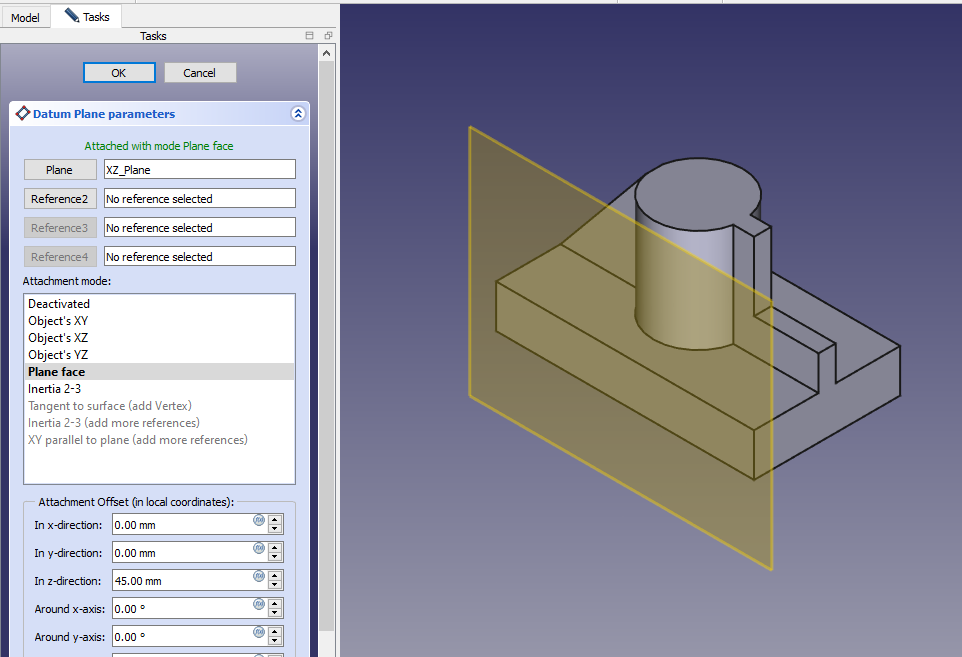
 Now create the datum plane at distance of 45mm along XZ plane As shown in below image.
 Now select the datum plane and create below sketch.
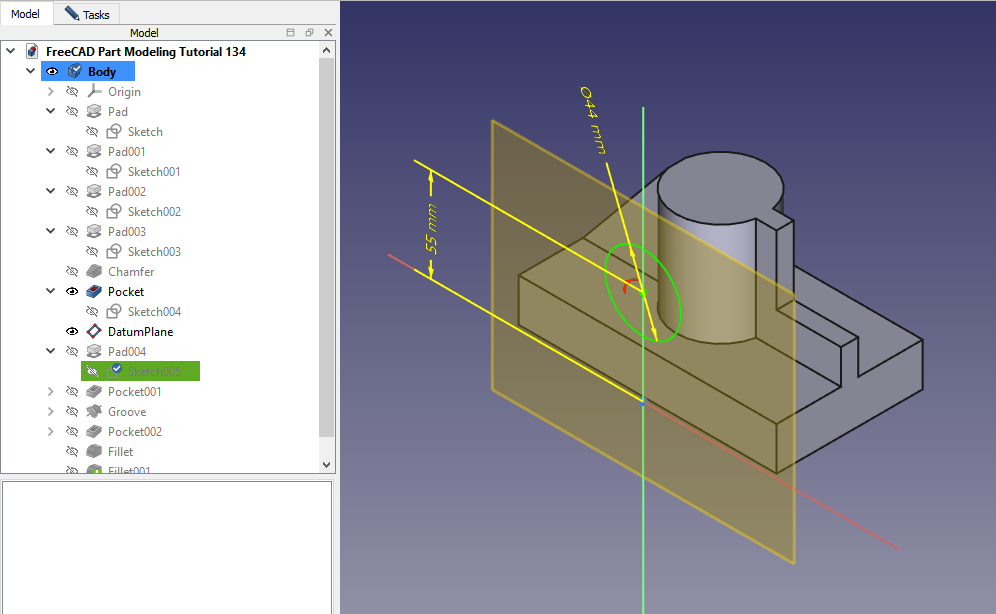 Now add the material as shown in below image.
 Now select the face and create the below sketch.
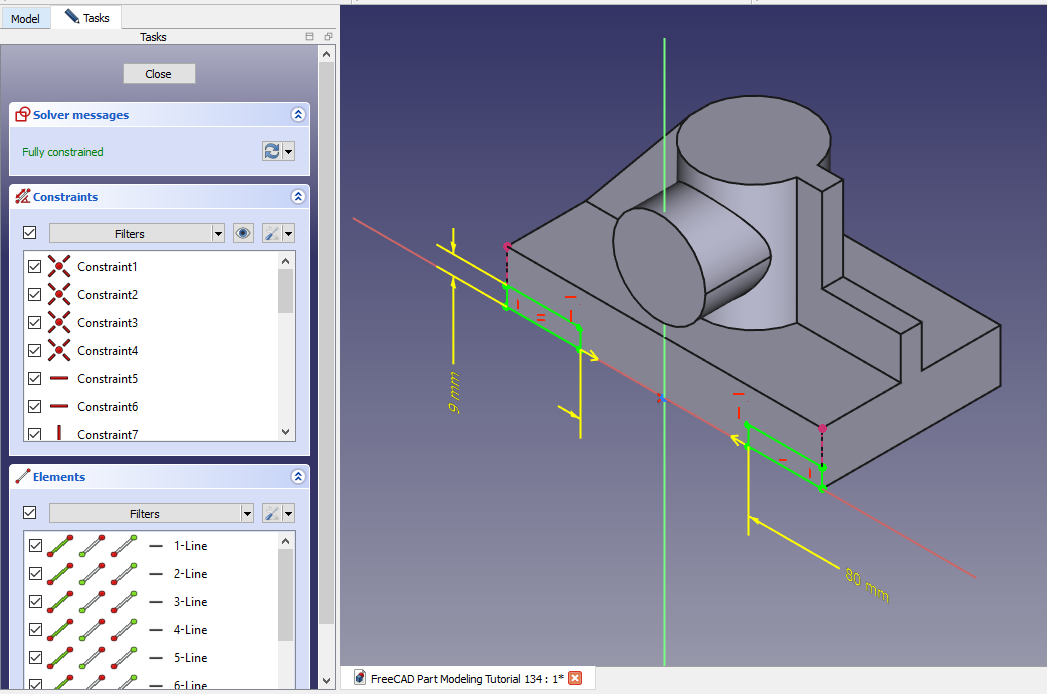 Remove the material As shown in below image.
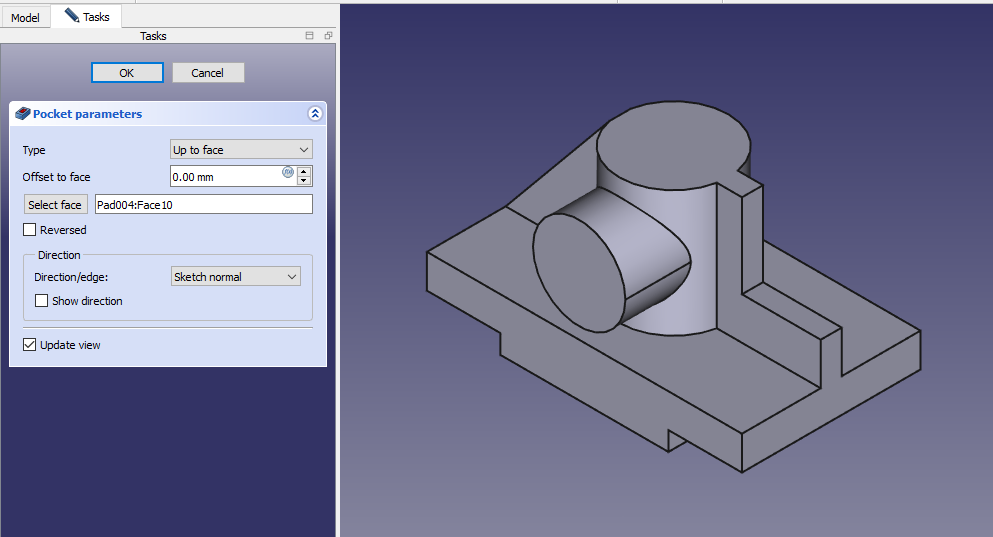 Now select the mid plane and create the below sketch.
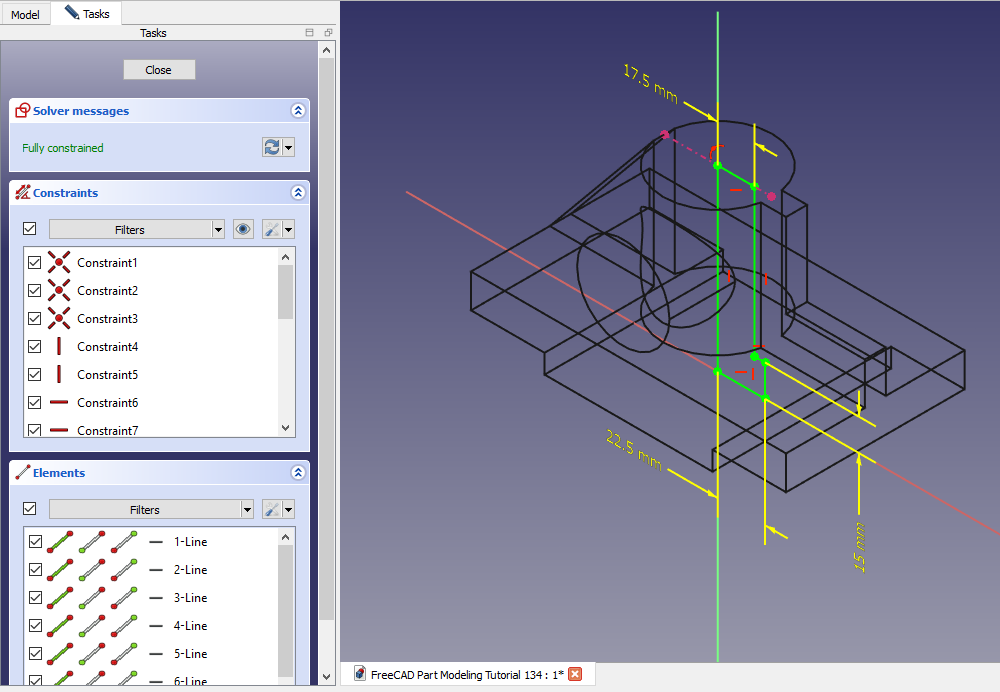 Create the revolve cut.
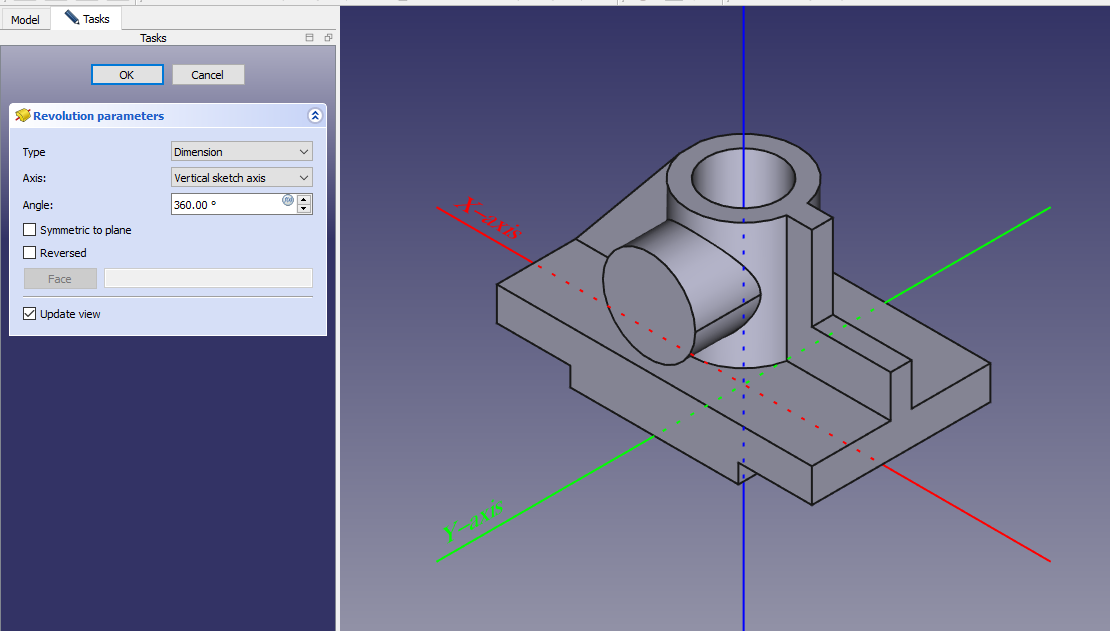 Select the face and create the sketch.
 Now create the cut as shown in below image.
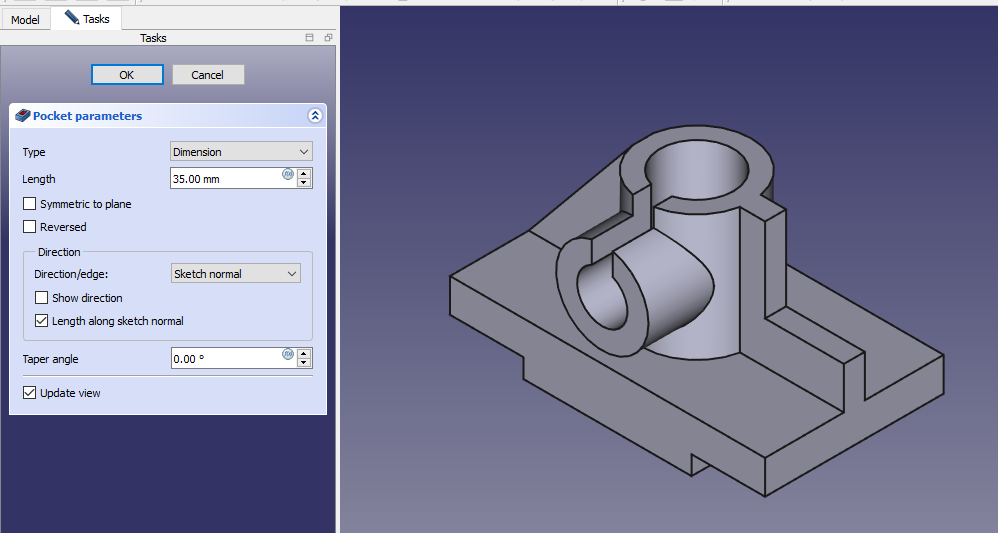 Provide the fillet of 3mm As shown in below image.
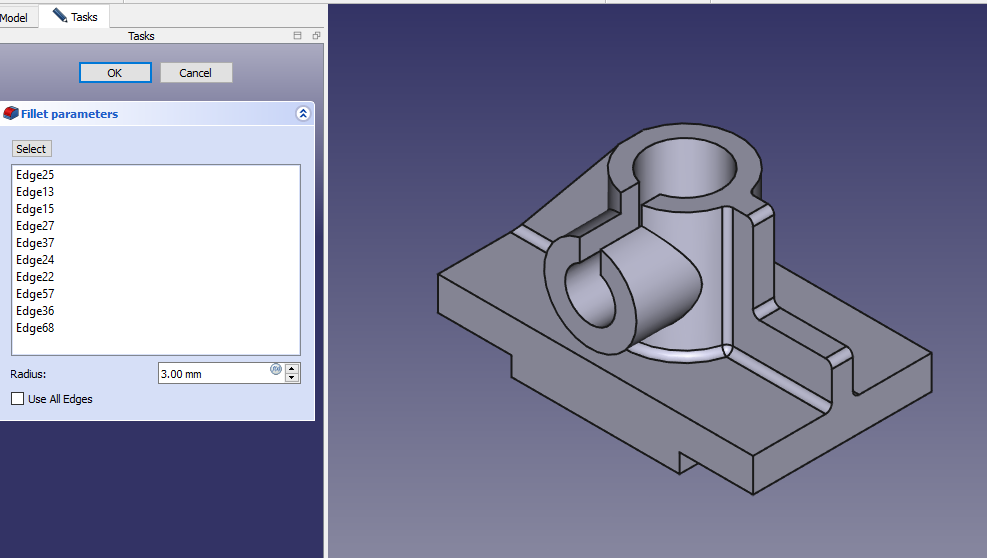
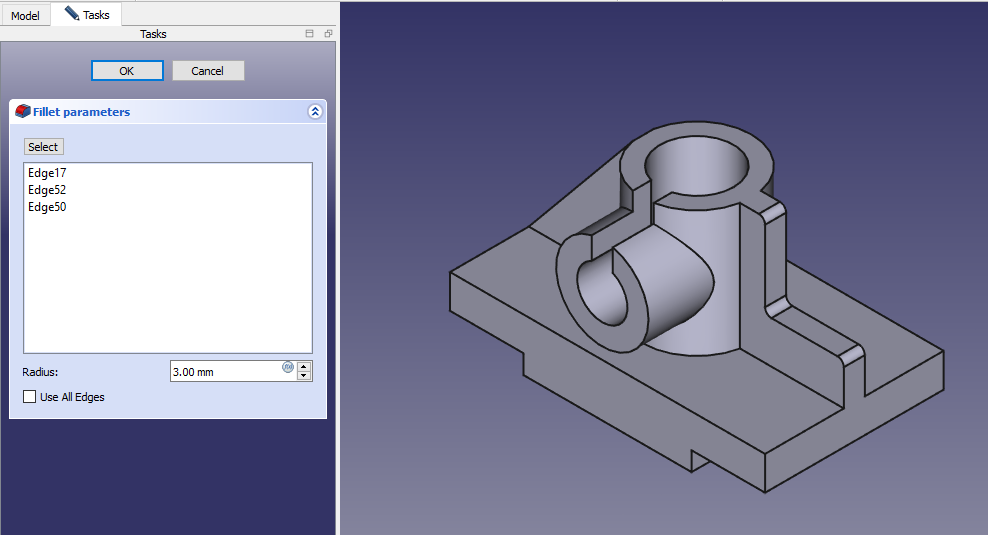 Now provide the fillet to shown edges in the image.
“Thank you for reading! If you found this article insightful and valuable, consider sharing it with your friends and followers on social media. Your share can help others discover this content too. Let’s spread knowledge together. Your support is greatly appreciated!”
Get CAD insights, mechanical engineering best practices, and machine design deep-dives delivered straight to your inbox—before the rest of the industry.
✅ One email per post ✅ No spam ✅ 1-click opt-out
✨ Join 500+ engineers already subscribed.
My FreeCAD Projects at Amount of Coffee-: